

Introduction
Combining Excel VBA with AutoCAD not only streamlines your work, but also allows you to create drawings with accuracy and consistency that is difficult to achieve by hand. This article will show you how to draw rectangles on AutoCAD by sending commands to the AutoCAD command line.
Rectangle Drawing Commands
To try it out first, type the following sentence in the AutoCAD command line and press enter at the end. Don’t forget the space between them.
AutoCAD may get clever and move the cursor out of the command entry area, in which case you should return the cursor to the command line.
RECTANG 0,0 200,300Now we can draw a rectangle with the coordinates (0,0) in the lower left corner and a width of 200 and a height of 300.
Let’s let VBA automatically perform this operation.
Sample code to draw a rectangle
Let’s start with a sample code that draws a rectangle with the values entered in Excel.
Prepare an Excel file like the one below. In this example, the base point is (10,10) and the rectangle is drawn with a width of 500 and a height of 300.
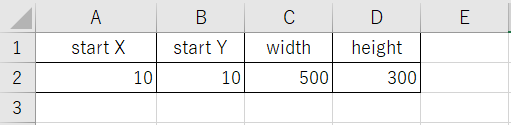
A2 to A4 are the input cells.
Next is the VBA code. Copy and paste the following code into your Excel VBA editor.
Sub DrawRectangleInAutoCAD()
  'Declare the AutoCAD application object
  Dim acadApp As Object
  'Declare the AutoCAD document object
  Dim acadDoc As Object

  'Declare variables needed for drawing
  Dim x As Double  'X-coordinate of the starting point
  Dim y As Double  'Y-coordinate of the starting point
  Dim width As Double  'Width of the rectangle
  Dim height As Double  'Height of the rectangle
  Dim commandText As String

  'Start AutoCAD if it is not running, or get the existing instance
  On Error Resume Next
  Set acadApp = GetObject(,"AutoCAD.Application")
  If acadApp Is Nothing Then
    Set acadApp = CreateObject("AutoCAD.Application")
  End If
  On Error GoTo 0

  'Create or get an AutoCAD document
  On Error Resume Next
  Set acadDoc = acadApp.ActiveDocument
  If acadDoc Is Nothing Then
    Set acadDoc = acadApp.Documents.Add
  End If
  On Error GoTo 0

  'Retrieve values from Excel
  x = Cells(2, 1)
  y = Cells(2, 2)
  width = Cells(2, 3)
  height = Cells(2, 4)

  'Create the command string
  commandText = "RECTANG " & x & "," & y & " " & (x + width) & "," & (y + height) & " "

  'Send the command to AutoCAD
  acadDoc.SendCommand commandText & vbCr

  'Make AutoCAD visible
  acadApp.Visible = True

  'Display a message
  MsgBox ”The rectangle has been drawn!”

End Sub
- Lines 3 and 5 prepare the AutoCAD object.
- Lines 8-12 are variables needed for drafting.
- Lines 14-20 set the AutoCAD object. If AutoCAD is already running, set it; if not, start a new one.
- In lines 22-28, set the AutoCAD file. If the drawing is already up and running, set it; if not, create a new file.
- Lines 30-34 retrieve the values from Excel.
- Line 37 creates the command statement. This is the key part of this code.
- Line 40 sends the command to AutoCAD. This is the key part 2 of this code. A line break (vbCr) is added to finalize the command.
Conclusion
AutoCAD operations using Excel VBA may seem a bit daunting for beginners, but once you understand how it works, it is easy. By applying rectangle drawing, automatic generation of complex shapes is no more than a dream. Experience the joy of automation while improving the efficiency of your daily work!
This code draws rectangles, but it’s well-rounded!


コメント